Under Construction....

Please excuse my interweb-dust! Changes are underway- thanks for your patience!

Thursday, October 3, 2013

Little Wife's Guide To: How to Sew on a Button

I had a roommate in college who once popped a button off of her winter coat. And she had no idea what to do. And I realized- not everyone knows how to sew a button back on!

If you're one of those people, don't feel bad. I was lucky enough to have a mom who knew how, and she taught me. And today, I'm going to teach you!

 Now, I'm definitely not a button-sewing expert (by any means!) but this is my little tutorial on how to sew on a button. It may not produce the most glamorous button stitch-work out there, but it gets the job done- Little Wife style.

You're going to need a needle and thread. I like to use shorter needles for sewing buttons.

Step 1:

 First things first- you'll have to thread the needle. Dampening the end a little should help.

Step 2:
 When you're needle is threaded, cut off the end still attached to the spool. Put the ends together.

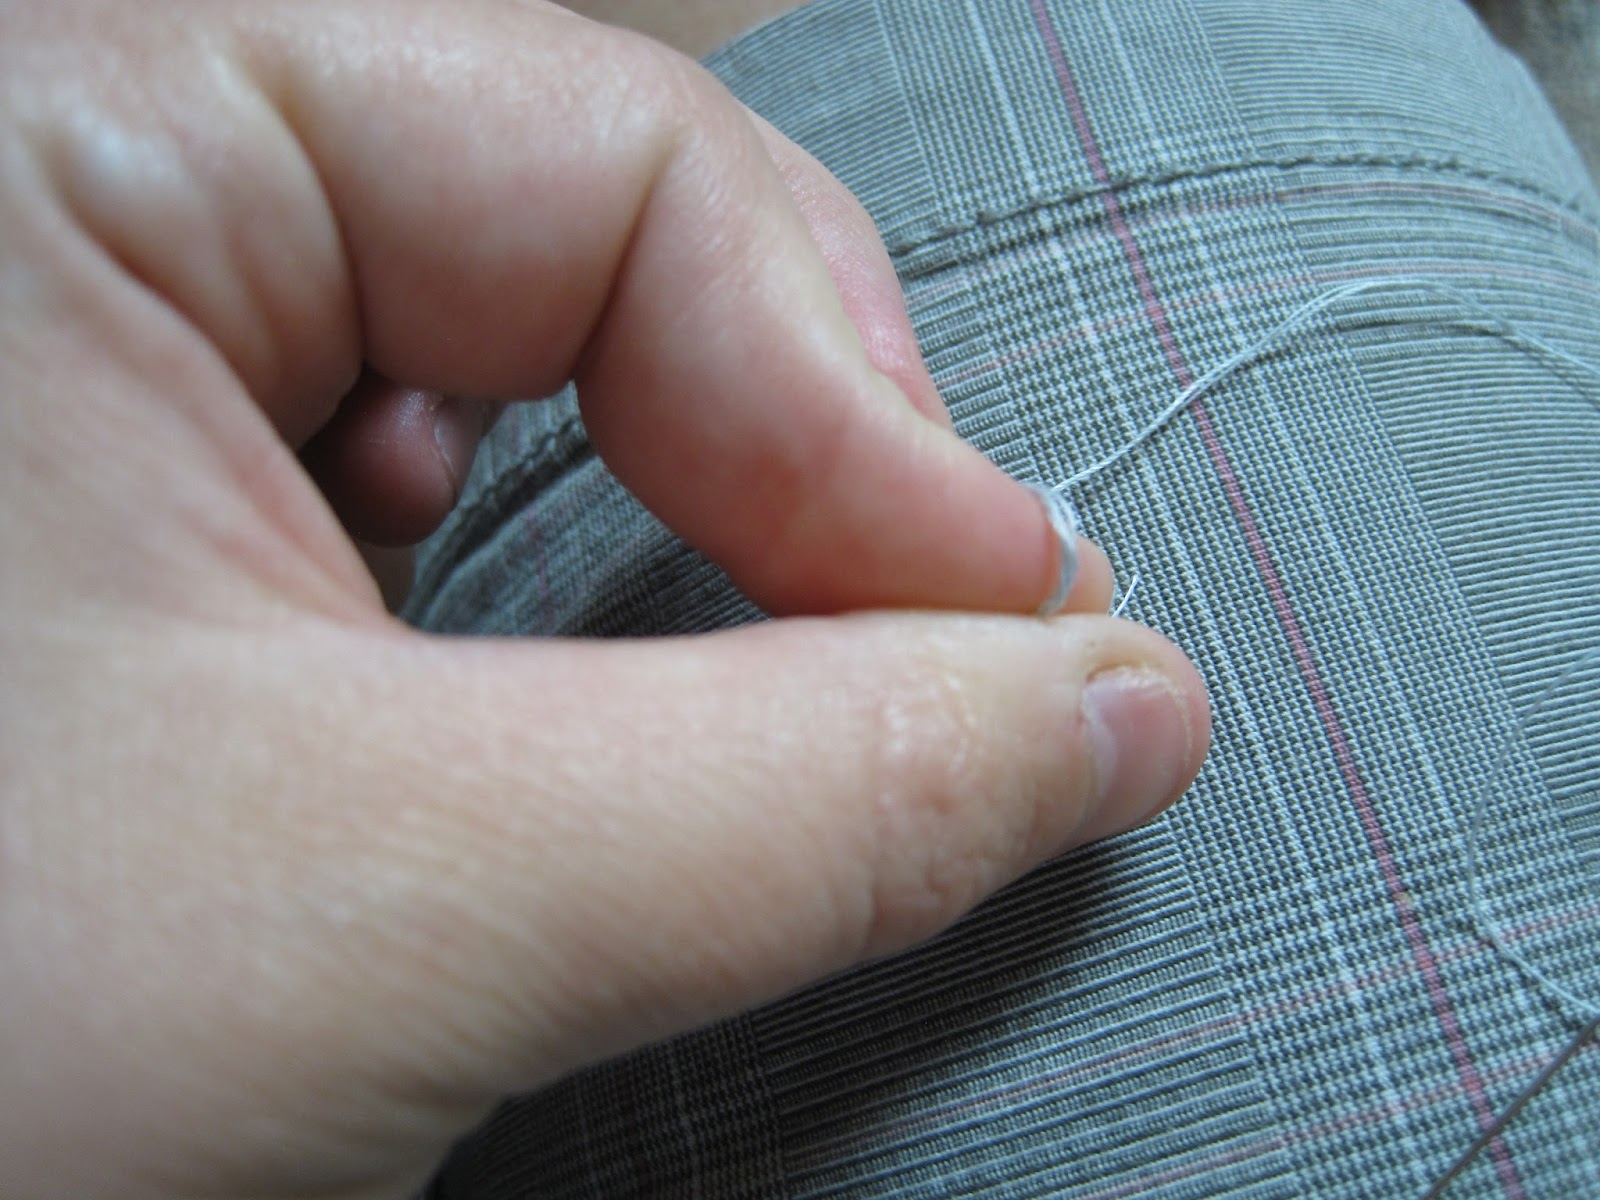
 Then, to tie a knot, I loop the threads around my index finger, then pinch and twist the thread.


Then I pull the knot to the end of the string. This doesn't have to be pretty. No one will see it! The two strings should now be tied together. I like to use this double-thread method because I think it holds more strongly- and then one stitch produces twice the thread hold!

Step 3:
Usually, the place where the button fell off will have a mark- either leftover threads or a whole or a worn spot. Find that and then, push your needle through the wrong side of the fabric. Pull the thread tight. Then choose a hole in the button and thread your needle through.

 Put the needle through the opposite hole in the button, and then through the fabric on the right side. Pull tight.

You've made your first stitch! Your button should look like this, and your needle is now on the wrong side of the fabric. Make sure your button is tight to the fabric before you move on.

Step 4:
 Put your needle through one of the holes you haven't yet used, and then through the opposite hole again.

Step 5:
Your button now looks criss-crossed, like this! Follow steps 3 and 4 several more times, until you feel that the button is secure.

 Step 6:
As you can see, my "no nail-biting goal" isn't going great...
 Now it's time to finish it up with a good knot. Push your needle through to the wrong side of the fabric.

 Then put your needle through the back side of some of the stitches you've made. If you hit a little fabric here, that's okay.

 Pull the needle through to make a loop. I usually hold on to the loop to make sure I don't pull it all the way through!

 Pull your needle through the middle of the loop, so it looks like the picture below.


 Then go under the middle thread to complete the knot.

Pull tight to secure the knot, and then clip the excess thread.

Ta da! Button sewn.

Look at you, you frontiersman! You pioneer woman! You independent, button-sewing tough guy.

And that's how you sew on a button!


Tuesday, October 1, 2013

The Page with the Pages! (Daily Do's Household Binder Planning Pages)

Wow! My previous posts about my family planning binder were a hit!

The pictures I took of my planning pages are kind of blurry and not very user-friendly, so I thought I'd give you guys versions of my planning pages in JPEG format- so you can see them better and perhaps even print them! Martha Stewart is coming out with family binder planning pages- her 2013-2014 Monthly Calendar pages go for like, $30 a set. Crazy. You are welcome to use my templates for free!

Remember, though- if my templates aren't what you're looking for, make your own! To have a planning binder that works for you, you've gotta Make it Yours, Make it Flexible, and Make it Routine!

To see more about how I use my binder, click here.


Here's a copy of my Daily Do's Pages (I have these printed double sided).


And a copy of my Weekly Do's and Week at a Glance pages. I printed the Do's on one side and the Week at a Glance on the other. Of course, my Weekly Do's may be very different from your chores each week (cuz not everyone has two kitchens. I do. What what?)


My Month at a Glance Calendar Page:

And some of my Miscellaneous pages (namely, Budget Tracker, Grocery List, and Shopping List):


Of course, these are just the basics. Like I said, Make it Flexible! My pages have really changed- they don't look anything like they did back in June. I'll most likely be adding pages as the life of my family changes- so stay tuned for more! I'll post new pages as I create them!


Would any of these pages work well for your family? What type of organization do you use?


  .

Saturday, September 28, 2013

Bear with Me...

This Little Wife is busy changing things up here in ye old blog-land--- thanks for being patient with me while I get going on it!

A Little Wife's Happy Life will be getting a new look soon (just as soon as I can figure out how to get it the way I want it and have enough internet access to do so!)

Friday, September 27, 2013

Frugal Friday- Little Wife's Guide To: Making a Cardigan


My husband had to go get the exhaust fixed on the truck this evening, so that meant I was home alone. What to do... what to do....

Upgrade a too-big shirt into a cardigan, of course!

I love Goodwill- specifically, our Goodwill. It's got some really great stuff- high quality, gently used, and now just waiting to be loved by someone new. Goodwill is an awesome place to save money on clothes. Even if something's not exactly what you're looking for, $4.00 for a shirt isn't bad, even if you have to do some tweaking!

I got this great gray long-sleeved shirt at Goodwill the other day- it was so soft! But I already have a lot of long-sleeved shirts... I was really looking for a gray cardigan. Here's how I turned my long-sleeved shirt into the cardigan I was looking for!


 Here's the shirt. First, I washed it and dried it (like, 5 days ago, but I never put it away... hee.)

 Next, I measured the width of the shirt and marked the middle. I measured about 5 times- the shirt narrows at the waist and widens at the bottom (most shirts will!) so to make sure my line was straight, I made sure the measure a lot.


Then I cut the shirt at my measurements, so it opens at the front. Like 'dis!

Then, I cuffed the edges so they were folded 1/4 inch towards the outside edges, and then folded them under. This way, my edge won't fray. I pinned up the edges. And, since my husband wasn't home, I took the pinning downstairs and watched a little "Last American Cowboy."


Then I used a zig-zag stitch to sew up the edges. At this point, I got hungry, so I went and had a cookie for supper. No husband to feed, you know.


The finished sewn edge looks like this... and then I removed the pins... cookie still in hand.


I decided to add buttons to my cardigan next. I've never made a buttonhole in my life, so the buttons are just decorative.
Zeke's grandma was the one who saved these buttons. After she died, at the age of 98, I was given her sewing basket and all her odds and ends. She must have saved years of buttons- most with little scraps of fabric attached. I wonder who wore the blue shirt these buttons were once a part of... probably grandma herself.

Anyway, I found four of these buttons, and put the bottom button 6 inches from the bottom of the cardigan, and then a button every three inches from there up.
And voila! Shirt becomes a cardigan!


Tuesday, September 24, 2013

Balls. (True Story Tuesday)


So, my Hunky Husband and I live in Iowa, right? Iowa has a lot of beef. And one favorite tradition in places with a lot of beef is the infamous Testicle Festival. Not joking.

Zeke and I went to a "Test Fest" ... um.... four summers ago. It was my very first encounter with beef testes. Zeke has had lots of other chances to witness beef testicle, in several different situations. Including this one...


(In this picture, calves are being branded and castrated. Hunky Husband is the labeled person... he's holding the back legs of a calf. Meanwhile, the calf is quickly being branded, vaccinated, and his... well, his gentleman parts are being removed. The calf will be up and running around, like nothing ever happened, in no time.)


Tangent- It still amazes me how much Zeke has taught me about the life of a farmer. I lived in a teeny tiny agricultural town in Iowa for 8 years, and it wasn't until meeting Zeke that I actually understood any of the things going on around me. Amazing. You see, my Hunky Husband grew up with stuff like this in his back yard...


... while I grew up in total suburbia.

Even further tangent- see the coat he's wearing in the second picture (the one with the corn getting sucked into the auger)? It's this coat.

Anyways, my first Testicle Festival was... well, actually kind of fun. I got my picture taken by a sign- proof that there is such an event to all of my Chicago college-mates.


Hunky Husband and Little Wife. Guess who's who?.


I even ate the Rocky Mountain Oyster sandwich. Balls on a Bun. Gourmet Gonads. Yes, I did. I have eaten testicle.


Rocky Mountain Oysters, or beef testes, on a bun.
 And it was good. True story.


Wednesday, September 18, 2013

Lies I Found on Pinterest

Ah, Pinterest... what can we say about Pinterest? It's a fantastic way to waste an hour (or three) while your husband watches movies that you don't really care for... it's great for finding awesome DIY projects and recipes.... and it's full of lovely lies.

Some of these lies sound soo appealing. So romantic. And they're so untrue. I think it's kind of funny some of the things that are posted- so dramatic!- and then other times, things get under my skin. I think it's important to protect our minds from some of the unrealistic expectations that are so common in our culture today, so here are just a couple Pinterest untruths I found this past weekend....

 I'm all for respecting yourself, but this one just seems so self-centered. Serves YOU, grows YOU, makes YOU happy... maybe we should walk away from thinking that we ourselves are most important and start thinking about what serves HIM, what helps us grow to be more like HIM, and makes HIM happy.

Um, pretty sure that my husband does not "accept me completely." He finds certain things unacceptable. Like when I'm impatient and let the emotions get the best of me around my sisters. Or when I'm selfish, or when I lie... My husband isn't supposed to accept me completely, he's supposed to sharpen me. He's a tool to make me more like Christ- and I'm the same for him.

Okay, lots of girl-power here- which isn't a bad thing, but do you notice the double standard? We want a guy who "needs" us, without needing anyone ourselves. Not only does that put all the pressure on woman to be self-sustaining, but it also exempts the guys from any responsibility. Nice catchy sentiment, but totally wrong message.

 Fall in love with yourself first? Before what? Before loving others, before loving the Lord? Again, it's all about ME and loving ME!

I'm pretty sure that last night, I didn't feel lucky to have Hunky Husband. He left his nasty, dirty socks on the floor again, and for a brief moment, I felt rather unlucky. And you know what? I think that's part of marriage! You're not always going to feel "lucky," but marriage is forever.
 Nice quote. Who wouldn't like someone who looks at you like you might be magic? But I'm pretty sure that first thing in the morning, when I've got morning breath and my hair looks like something from a Doctor Seuss book, my darling husband, while he loves me, doesn't look at me as a magical being. I'm human. Totally and completely human- nothing magical about me. And so is Zeke. And that's real life.

Are we seeing a pattern here, a little? Do more of what makes YOU happy. Maybe what makes ME happy isn't what makes God happy. We've become such a "me" centered society that we can't even see how selfish this is!

Oh wow. Can we just... wow. Not only over-dramatic, but also very wrong. As a girl, I don't want a bad boy to be good just for me. I want a good man, one who is always good. A man who seeks truth and love and justice- that's the man I want. A man who wants a girl to be "bad" just for him is a man who doesn't respect the girl, one who wants a woman to compromise her values and morals for him. Neither of these statements are healthy, and both lead to a bad relationship.

See what I mean? On the surface, so many of these cute or romantic little sayings are nice and innocent and appealing- but what's really behind them? So many of these quotes show us as a people to be selfish and unrealistic.

Before pinning, think. Does this really portray an attitude I want to foster, or is this just a lovely Pinterest lie?

nRelate Posts Only